


Tilling the garden is a mid-fall ritual for a lot of folks. It makes sense to till out the weeds and bring some fresh soil up to the surface. To simplify this job and add nutrients to the soil, Greta and her family use the no-till garden method. By covering the garden with straw instead of tilling, she improves drainage, aeration, and microorganisms while also helping with composting. Here’s how to utilize this method in your garden. Plus, we’ll take a look at how the Ropp family harvests and dries their walnuts.
What is a No-Till Garden?
Basically, it’s the process of covering your garden in order to add nutrients and improve soil quality over the winter without turning the soil. Instead, you layer organic materials on top of the area you want to plant in the spring.
Start with a Clean Up
Every no-till garden starts with a fall garden cleaning. Greta has already pulled out corn stalks and anything else still standing. Be sure to remove any weeds or plants that can go to seed and properly dispose of them, or compost them in a special pile that gets hot enough to kill all the seeds. These include lettuce, leeks, cabbage, onions, and others. The rest can be laid down in the garden as the first layer of your no-till garden. You can also feed those plants to your livestock.
Find a Sunny Spot. You need plenty of sunshine and rain this winter for the composting to work. Plus, you want your garden to be in a sunny spot during the spring and summer.
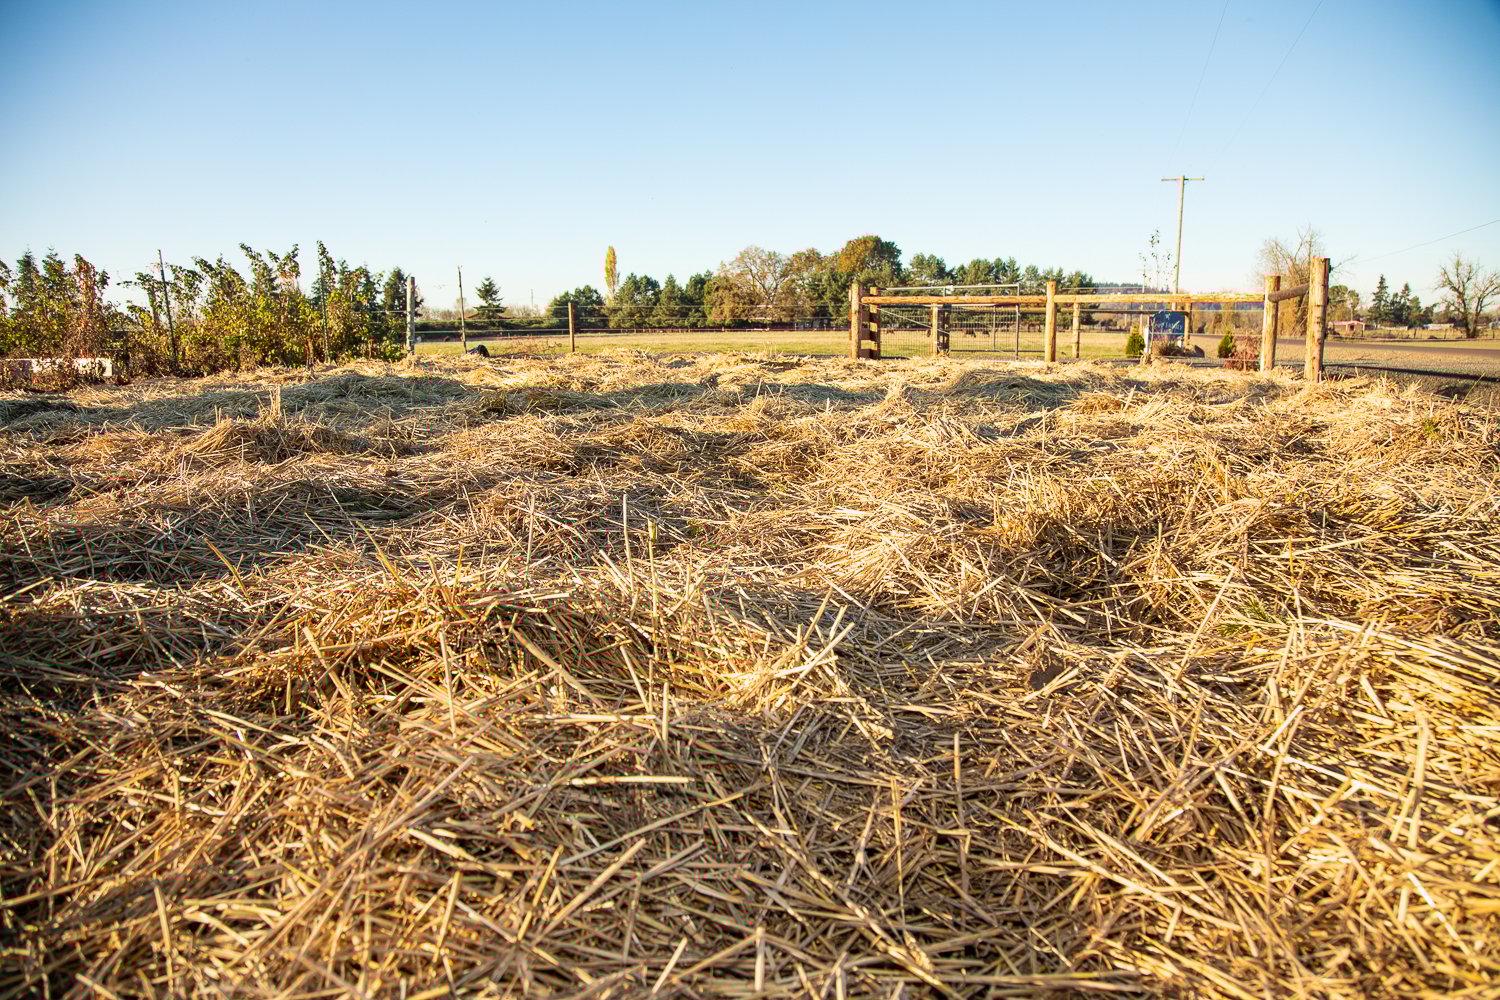
Greta covers her garden with straw. But you can also cover it with cardboard, several layers of newspaper (anywhere from 5 to 10 layers), straw, hay, or leftover corn stalks. Just about anything that completely covers the topsoil and composts will work. Then weigh it all down with some mulch. In fact, don’t skimp on the mulch.
Greta piles on some rotting leaves, manure, compost, and straw to the top. She then finishes it off with another six-inches of organic materials.
Give it plenty of water. If you live in an area that gets a lot of rain in the winter, you’re all set. If not, you may need to add water periodically throughout the fall and winter. Additionally, add some nitrogen. You can find bags of it at your local Coastal.
Harvesting, Cracking, and Drying Walnuts
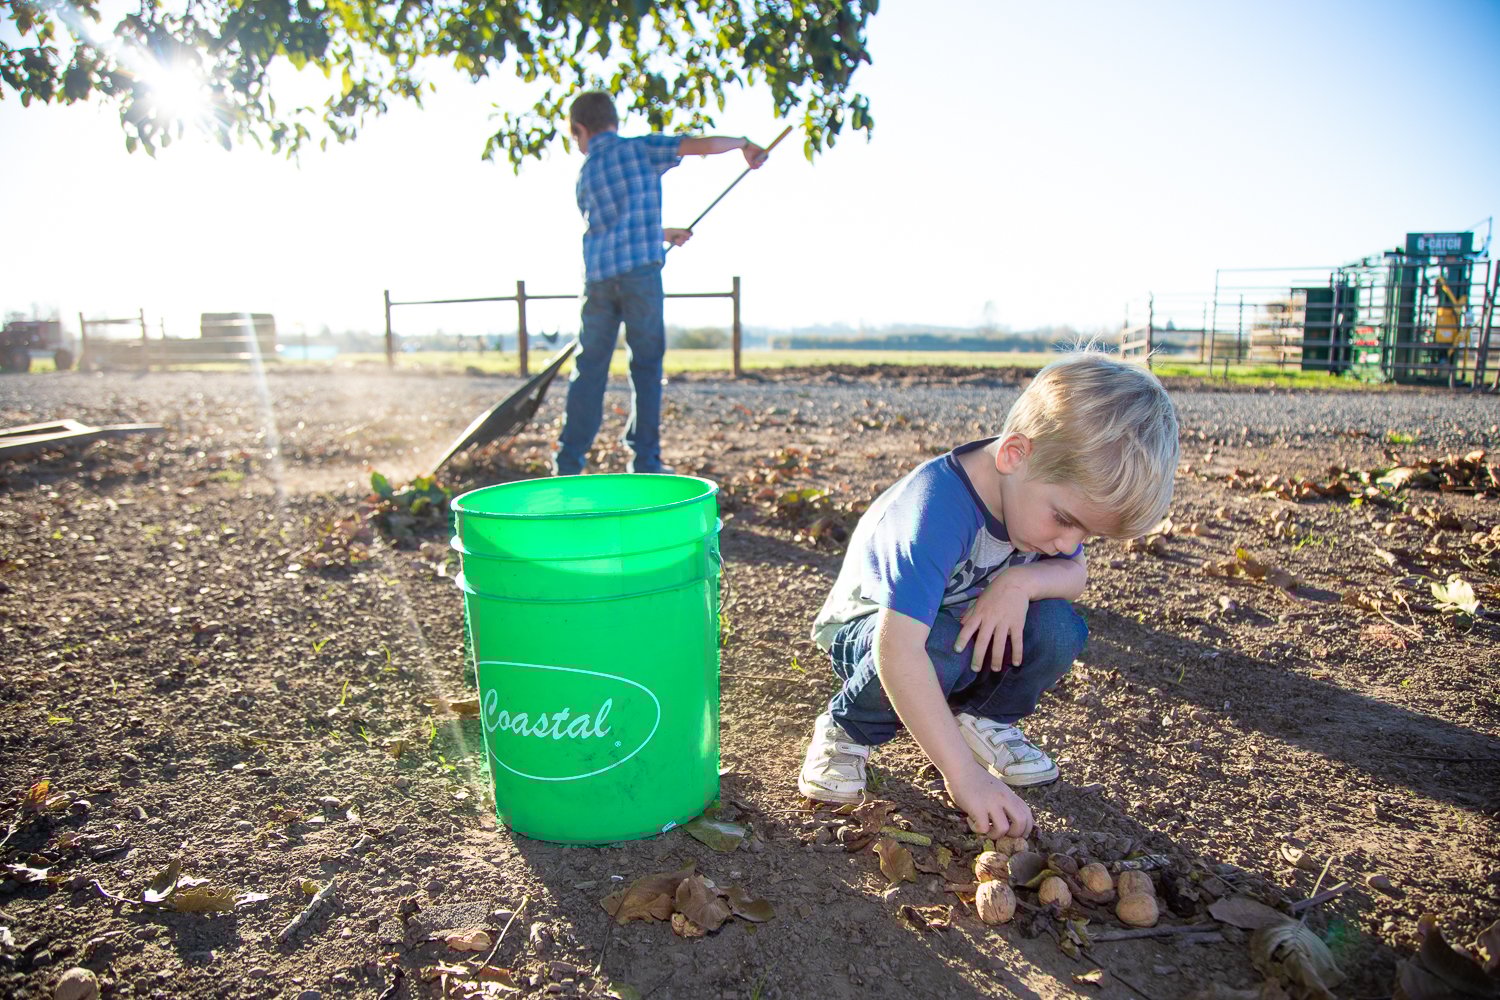
Greta’s kids have been raking and picking up walnuts from their property for a few weeks. To prepare them for use later, Greta and her crew will dry them.
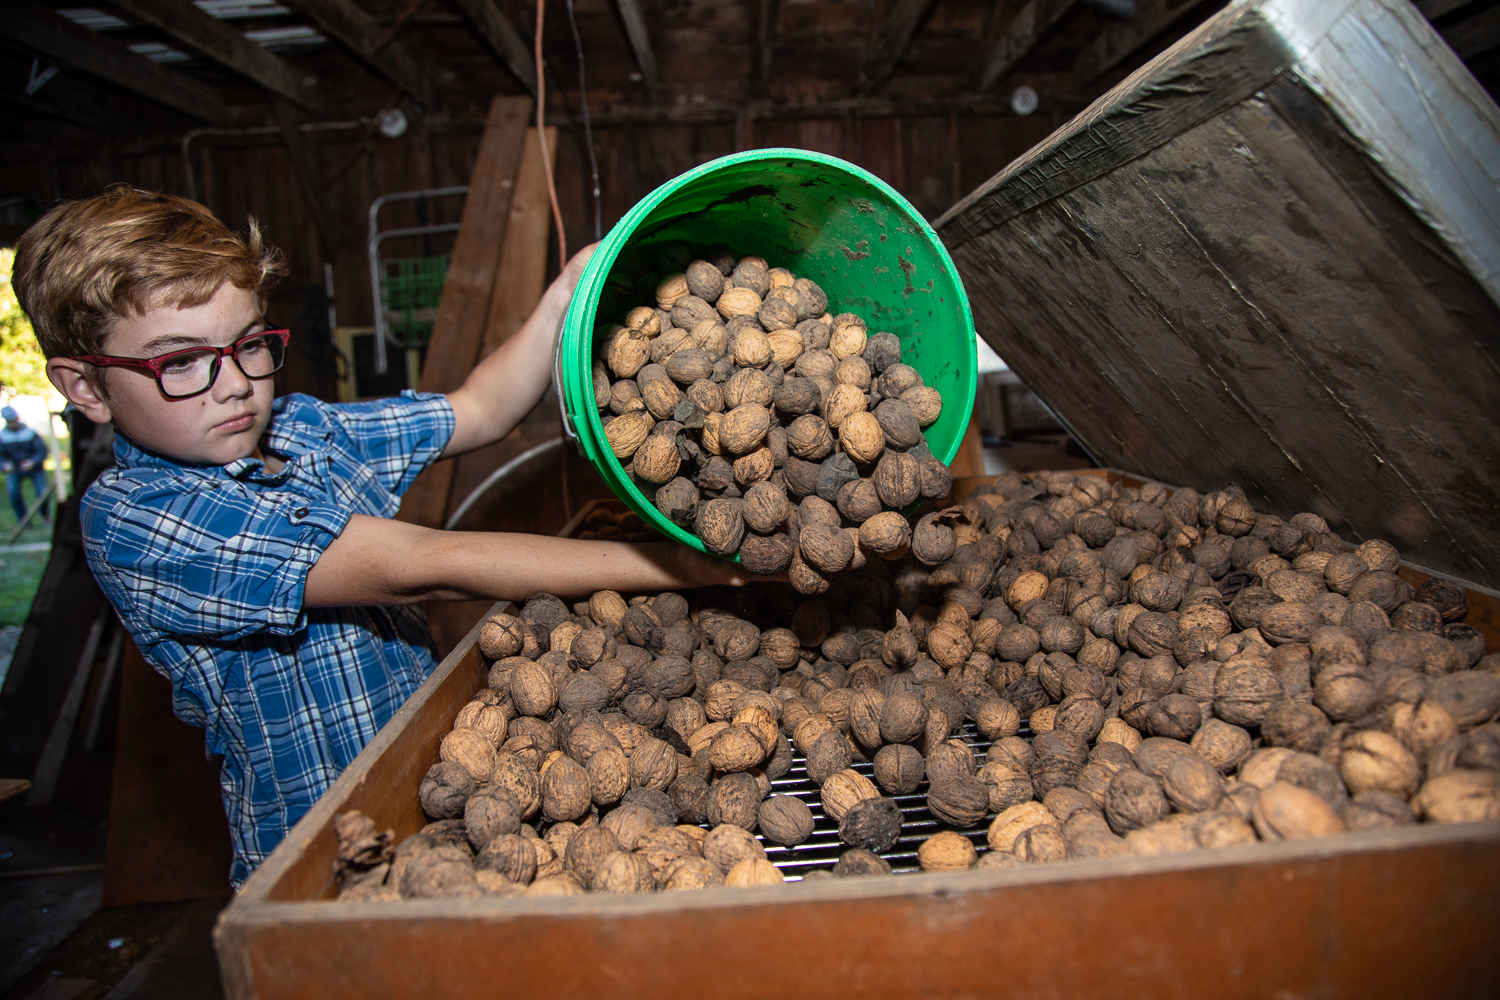
The Ropp family dries their walnuts in a homemade drier. The goal is to allow air to circulate around the nuts. Drying time usually takes five or six days, depending on where they are dried.
Nuts are ready for storage when the divider between the nut breaks. If that divider is rubbery, the nuts are not ready.
Coastal tip: Check out Oregon State University Extension service publication called Harvesting, Handling and Storing Nuts for more information.
Get Set for Winter at Coastal
Stop by your Northwest owned and operated Coastal and pick up everything you need for your no-till garden, including straw, compost, fertilizer, seeds, tools, and a whole lot more. While you’re there, check out our fireplace and stove department. We carry a huge selection of wood, pellet, and gas stoves to heat your home and warm your heart.