


This time of year, apples are falling off the branches throughout Oregon and Washington. Whether you have your own apple trees or plan to bring some home from a local farmers market, turning those fruit into applesauce is a quick and easy way to preserve them for a wintertime treat.
Always Use Safe Canning Recipes
We’re using a recipe from Oregon State University Extension Service. Download the publication Preserving Foods: Apples for this and other apple options.
Safely preserve your applesauce and other foods with advice and recipes from the professionals at Oregon State University Extension Service and Washington State University Extension Service. If you have questions about how to properly can and preserve, call OSU’s food safety and preservation hotline, open every summer through October at 1-800-354-7319.
Step 1: Wash and Core Your Apples
We used four pounds of apples for our recipe. Greta has Jonagold apples from her farm. These apples have a good balance of sweet and tart. If you’re going to the farmer’s market or store to buy your apples, look for varities such as Cortland, Crispin, Fuji, Golden Delicious, Jonamac, Mcintosh, Braeburn, Liberty, Ida Red, Rome, and many more.
Get your apples as clean as you can, and don’t leave any of the seeds.
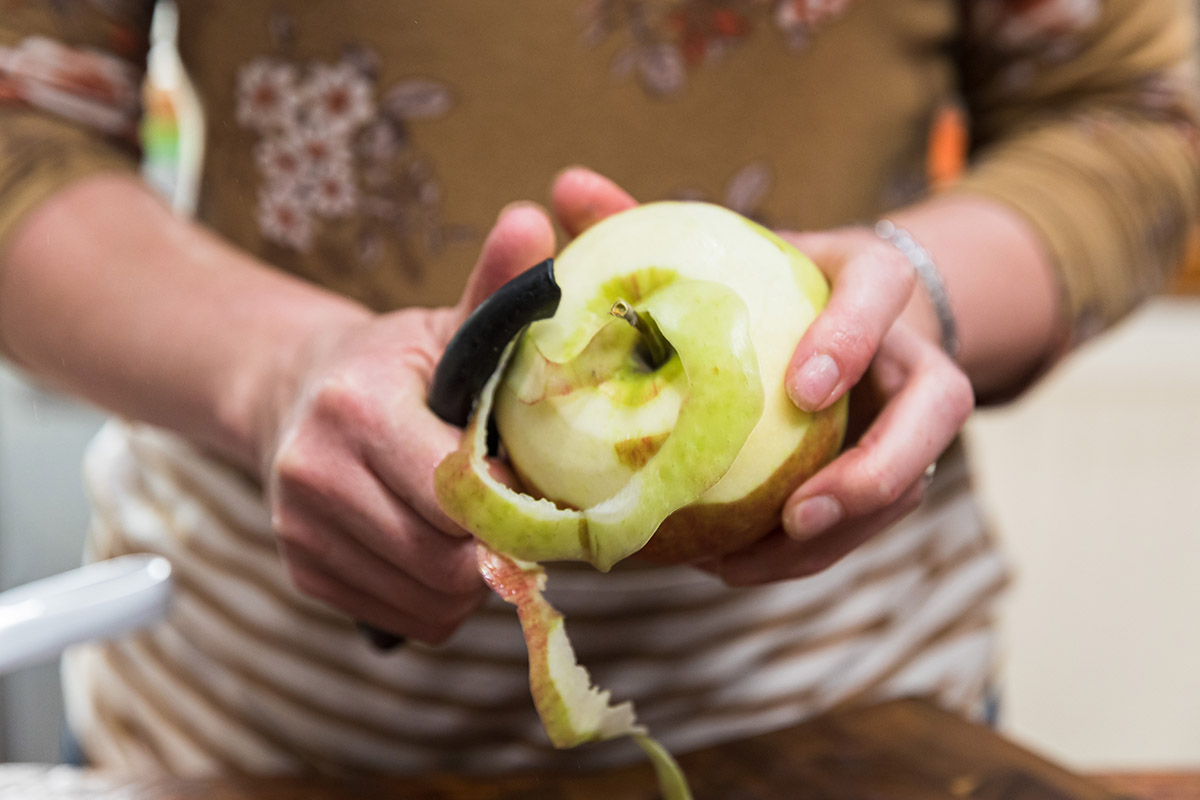
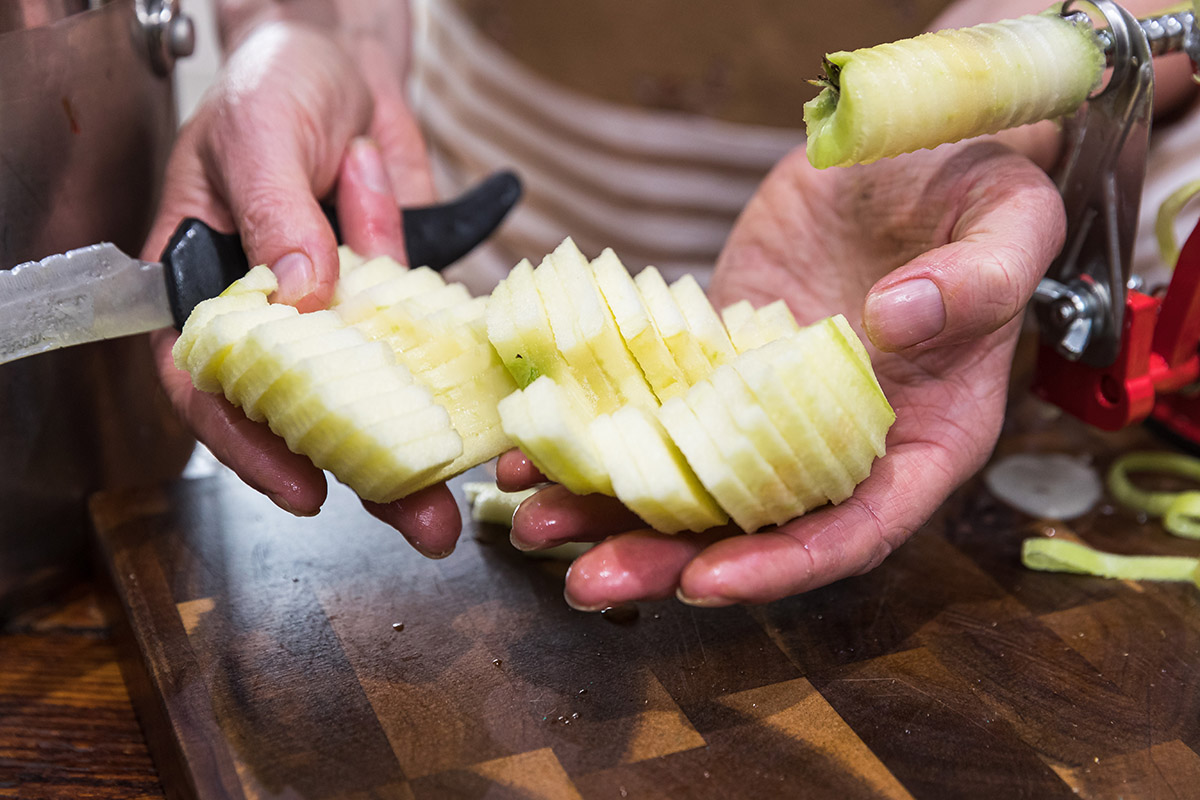
Step 2: Remove the Peels and Cut into Slices
Why remove the peels? Because unpeeled apples are more likely to spoil during storage. There isn’t an exact science to cutting apples. Any size slices are fine.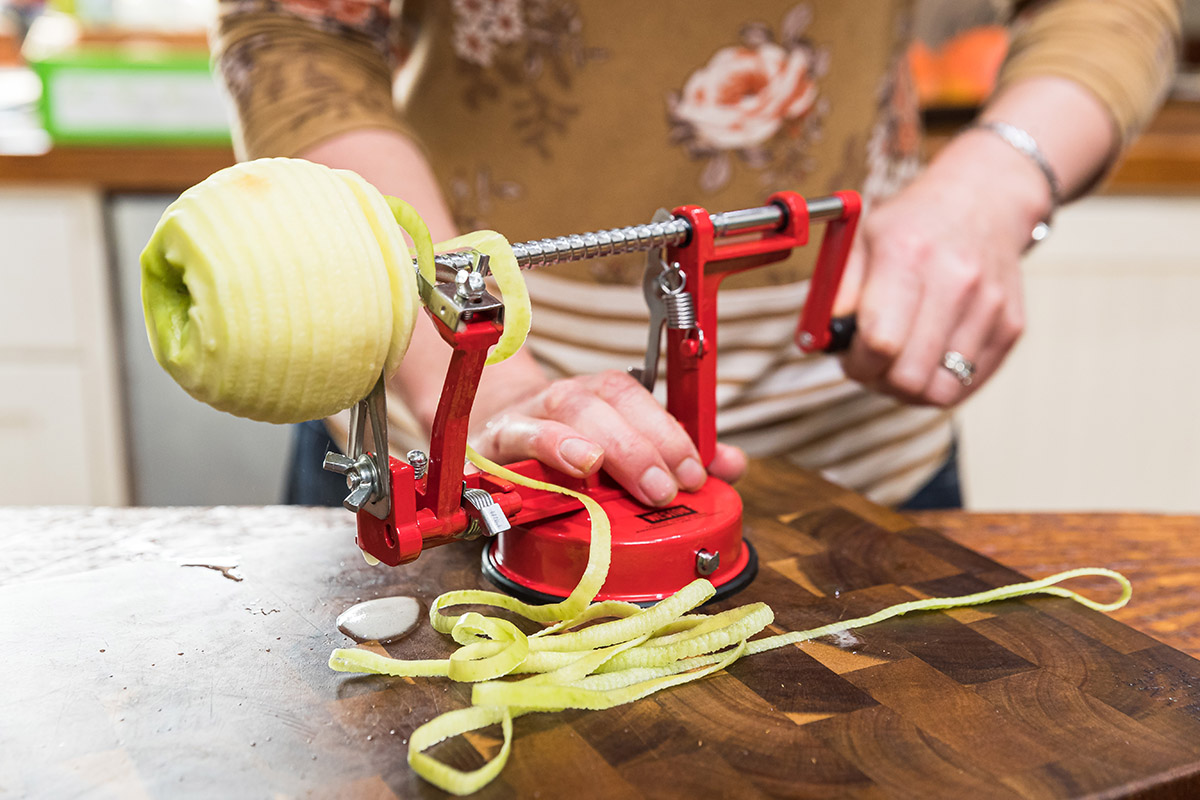
Coastal Tip: A 3-in-1 Apple Peeler available at Coastal makes light work of coring, peeling, and slicing your apples.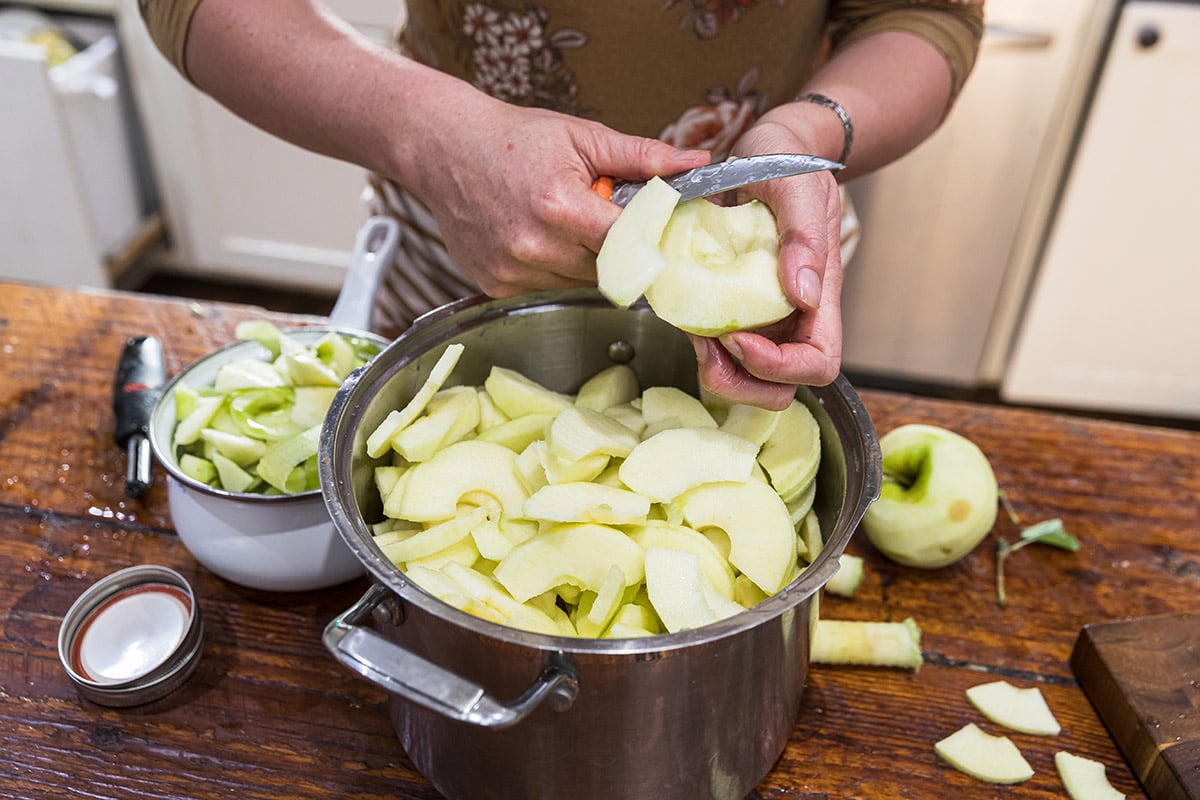
Step 3: Simmer in a Lage Pot
Add a small amount of water to the pot to prevent sticking. Simmer until the apples are soft.
Step 4: Mash Your Apples
The OSU recipe calls for use of a food mill, food processor, or a strainer to the the job done. If you like a chunky-style applesauce, you can skip this step altogether.
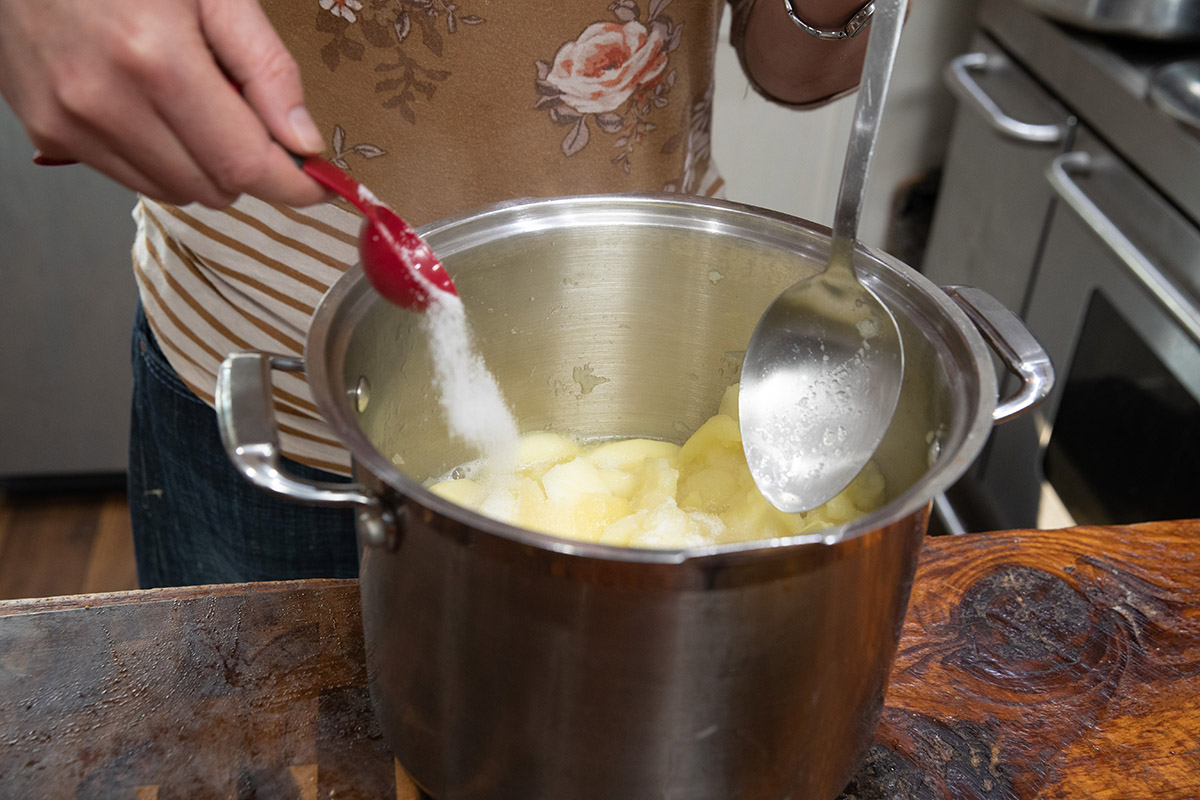
Step 5: Add Sugar to Taste
Reheat your applesauce to a boil.
Want to give your applesauce an added kick? Skip the regular sugar and add ¼ cup light brown sugar or 3 tablespoons honey, ¼ teaspoon ground cinnamon, 1/8 teaspoon ground nutmeg, and 1 tablespoon lemon juice.
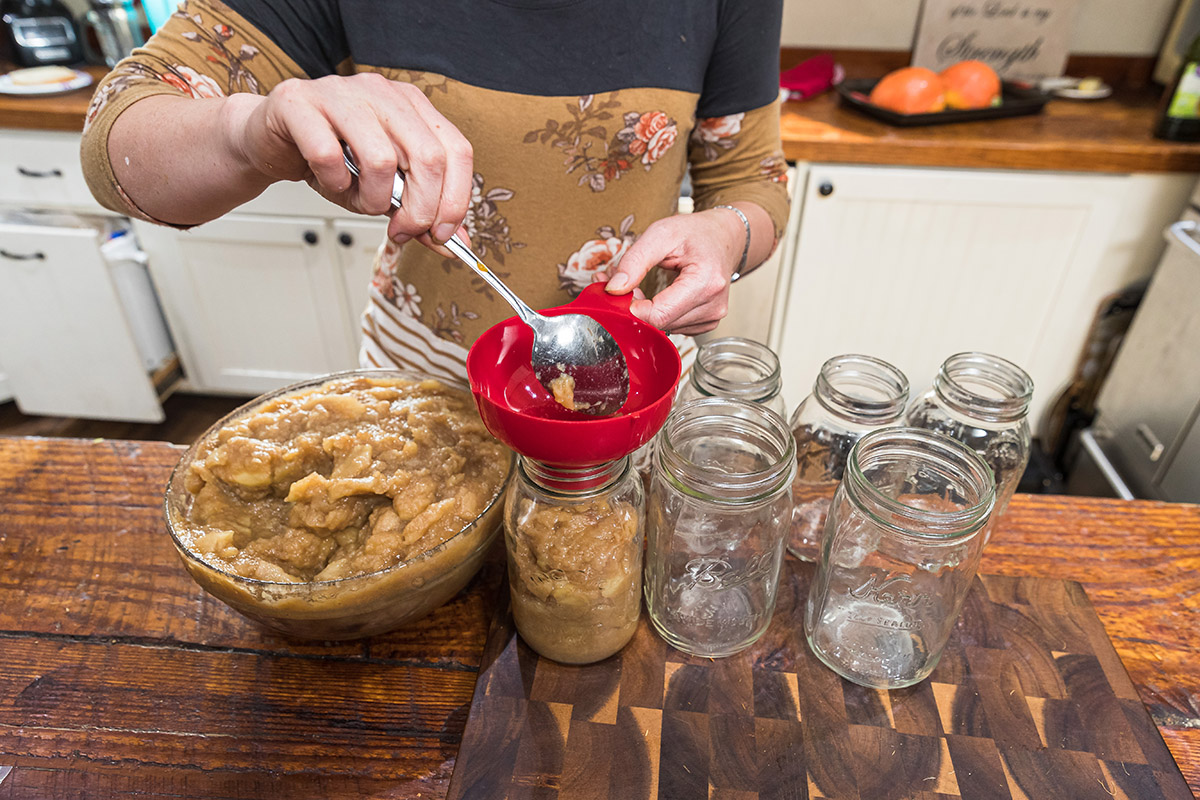
Step 6: Pour into Jars or Ziplock Bags
Leave ½ inch of headspace, whether you’re going to put your jars into a canner or simply freeze them. If you plan to freeze them, let them sit out until they are room temperature. Then put in the freezer. If you don’t have any jars, or you want to simplify your process, you can pour the applesauce into Ziplock bags and freeze them for later.
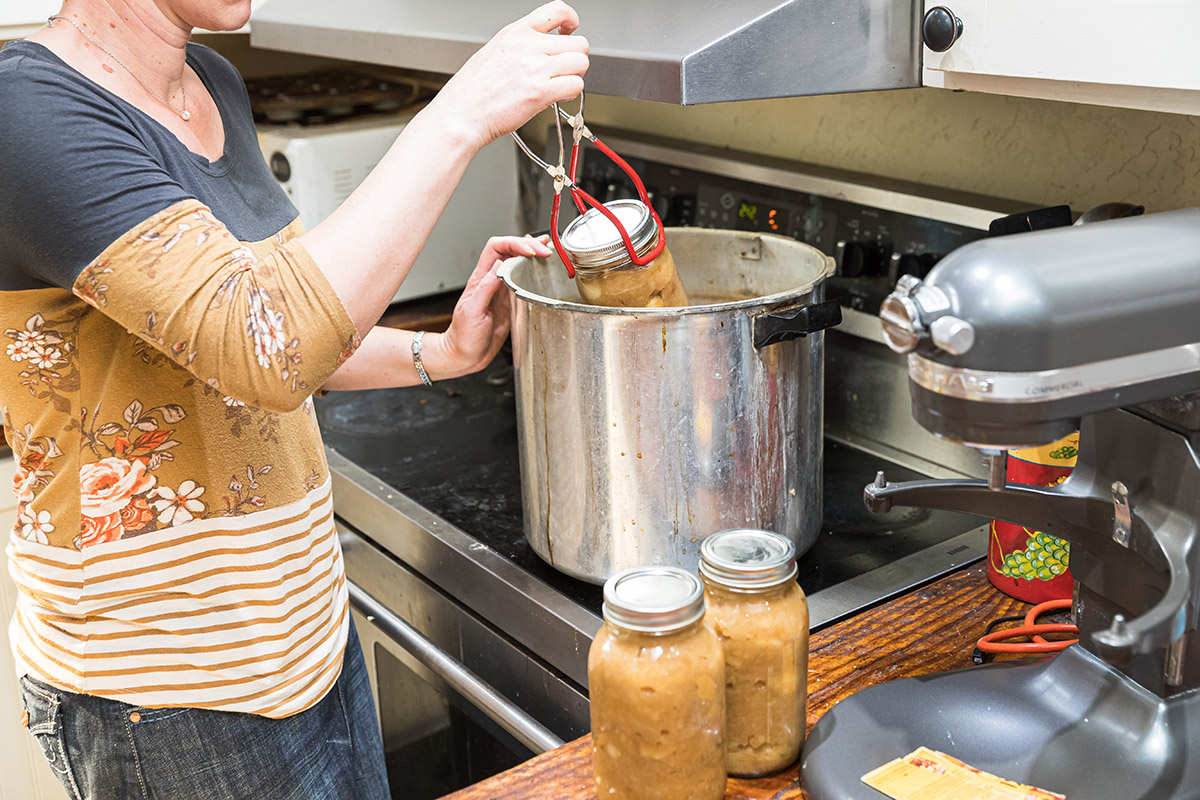
To process your creation, adjust your lids and place in a boiling canner. You want to give it 15 minutes for pints and 20 minutes for quart jars. Once done, take the canner off the heat and give your jars 5 minutes for cool before removing them from the canner.
Step 8: Enjoy Your Creation
Over ice cream or all alone, applesauce is one of life’s simple pleasures.
Get Your Canning Supplies at Coastal
We’re your one-stop for all of your canning supplies, including jars and lids in many sizes, pressure canners, additives, and measuring devices. Have a question about canning? One of our knowledgeable employees can provide the answers you need or point you in the right direction.